How to Restore Old and Stained Concrete Surfaces? - CHEMIKAL STATES

How to Restore Old and Stained Concrete Surfaces?

Over time, concrete surfaces can become stained, cracked, and discolored due to weather, oil spills, dirt buildup, and general wear. Instead of replacing your driveway, patio, or garage floor, restoration is a cost-effective way to bring old concrete back to life. Using the right cleaning and sealing products can make a huge difference. In this guide, we’ll walk you through the best methods for cleaning, repairing, and protecting concrete, featuring the powerful Chemikal States Oil Remover Solution as the go-to product for deep stain removal.


Step 1: Deep Cleaning – Removing Stains and Contaminants

Before restoring a concrete surface, it’s essential to remove oil stains, dirt, mold, and other contaminants that have penetrated the material.

1. Removing Oil and Grease Stains
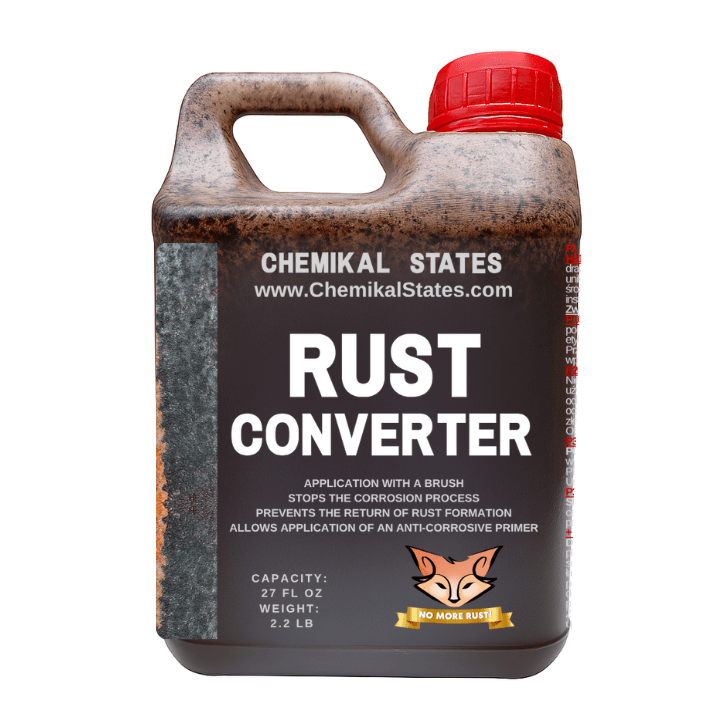
Best Product: Chemikal States Oil Remover Solution

  • Apply Chemikal States Oil Remover directly to the stain.

  • Let it sit for 15-20 minutes to break down the oil.

  • Scrub with a stiff-bristle brush for maximum penetration.

  • Rinse thoroughly with water or a pressure washer.

Why Choose Chemikal States?Industrial strength – Works on deep-set stains.
Safe for all concrete surfaces – Driveways, patios, garages, and sidewalks.
Eco-friendly formula – No harsh chemicals.

2. Removing Mold, Mildew, and Dirt

  • Use a concrete cleaner or diluted bleach to eliminate organic growth.

  • Scrub with a stiff brush and rinse thoroughly.

  • For tougher stains, a pressure washer can be used to blast away dirt and grime.

3. Neutralizing Efflorescence (White Chalky Residue)

  • Use a diluted vinegar solution or a concrete efflorescence remover.

  • Scrub the area and rinse thoroughly.


Step 2: Repairing Cracks and Surface Damage

Once the surface is clean, assess any cracks, chips, or spalling (flaking concrete).

For Small Cracks (<1/4 inch): Use a concrete crack filler or a polymer-modified cement patch. ✅ For Large Cracks (>1/4 inch): Use a concrete resurfacer or epoxy-based crack filler. ✅ For Spalled or Pitted Areas: Apply a thin resurfacing layer to create a smooth, even finish.

🔹 Pro Tip: Allow at least 24 hours for repairs to cure before applying a sealer.


Step 3: Sealing and Protecting the Concrete

After cleaning and repairs, sealing the concrete is crucial to prevent future stains and damage.

Choosing the Right Concrete Sealer

For driveways & garages: Penetrating sealer (silane/siloxane) – Repels oil and water.
For patios & decorative concrete: Acrylic sealer – Enhances color and provides UV protection.
For indoor surfaces: Epoxy or polyurethane sealer – Adds a glossy, stain-resistant finish.

🔹 Application Steps:

  1. Ensure the surface is completely dry.

  2. Apply sealer with a roller or sprayer in thin, even layers.

  3. Allow it to cure for at least 24-48 hours before heavy use.


Final Thoughts – Why Chemikal States is the Best Choice

Restoring old and stained concrete doesn’t have to be difficult. With the right cleaning products and sealing techniques, you can bring your surfaces back to life and protect them for years to come. Chemikal States Oil Remover Solution is a must-have for tackling oil stains, grease spills, and embedded dirt on driveways, patios, and more.

📌 Order now to give your concrete the care it deserves! Buy Chemikal States Oil Remover Here

Back to blog

For more in-depth information and to purchase a top-performing Rust Converter, visit Chemikal States. We offer expert products and advice to help you achieve the best results in your rust treatment projects, with fast $7 shipping available to get you started quickly.This "How to" collapsible section is designed to address common user queries, improving the site's SEO by incorporating practical advice, relevant keywords, and links to related content.

Rust Converter FAQs: Your Guide to Effective Rust Treatment

What is a Rust Converter and How Does It Work?

A Rust Converter is a chemical solution that neutralizes rust by converting it into a stable, paintable surface. It works by reacting with iron oxide (rust) to form a protective layer, preventing further corrosion. This product is ideal for treating rusted metal surfaces and preparing them for painting or coating.

How Do I Apply a Rust Converter?

Applying a Rust Converter is simple and straightforward. First, remove any loose rust, dirt, and grease from the surface. Then, apply the Rust Converter directly to the rusted area using a brush, roller, or sprayer. Allow the product to dry for 24-48 hours, during which it will convert the rust and create a stable surface ready for painting.

Rust Converter vs. Rust Remover: Which is Better?

A Rust Converter is better for neutralizing rust and creating a protective barrier, making it ideal for surfaces that will be painted or coated. A Rust Remover, on the other hand, completely removes rust but leaves the metal exposed, requiring immediate protection to prevent new rust. Choose a Rust Converter if you want a long-lasting solution that’s easy to use.

Can I Use a Rust Converter on Any Metal Surface?

Rust Converters are most effective on iron and steel surfaces that have rusted. They are not suitable for use on non-ferrous metals such as aluminum or copper, as these materials do not rust in the same way and will not benefit from the conversion process.

How Long Does the Protection Last After Using a Rust Converter?

The protection offered by a Rust Converter can last for several years, especially if the treated surface is properly painted or coated after application. Regular maintenance and inspections will ensure that the metal remains rust-free for as long as possible.

Where Can I Buy the Best Rust Converter?

For a high-quality Rust Converter that delivers long-lasting results, visit Chemikal States. Our product is designed for superior performance and easy application, ensuring your metal surfaces remain protected against rust. We offer fast shipping for only $7, so you can start your rust treatment project without delay.

How Do I Prepare the Surface Before Applying a Rust Converter?

Proper surface preparation is crucial for the effectiveness of a Rust Converter. Start by removing any loose rust, dirt, and debris with a wire brush or scraper. Clean the surface with a degreaser if needed to remove oils and grime. Ensuring the surface is clean and dry will help the Rust Converter adhere properly and perform at its best.

Can I Paint Over a Rust Converter?

Yes, one of the primary benefits of using a Rust Converter is that it creates a paintable surface. Once the Rust Converter has dried and fully reacted with the rust (usually after 24-48 hours), you can apply a primer and then paint the surface to enhance protection and improve appearance.

How Much Rust Converter Do I Need for My Project?

The amount of Rust Converter needed depends on the size of the area you're treating and the severity of the rust. Typically, one gallon of Rust Converter can cover up to 500 square feet of rusted surface. Be sure to check the product’s coverage guidelines to determine how much you'll need for your specific project.

Can Rust Converter Be Used on Outdoor Structures?

Absolutely! Rust Converters are highly effective for outdoor applications, such as fences, gates, and metal furniture. They not only neutralize rust but also provide a protective barrier that withstands exposure to the elements. After applying the Rust Converter, consider adding a weather-resistant paint or coating for added durability.

Is a Rust Converter Safe to Use?

Rust Converters are generally safe to use when following the manufacturer’s instructions. It’s important to wear protective gloves and eyewear to avoid contact with the skin and eyes. Ensure good ventilation when applying the product, especially in enclosed spaces. If you have any concerns, refer to the safety data sheet (SDS) provided with the product.

What Are the Common Mistakes to Avoid When Using a Rust Converter?

Avoid applying Rust Converter on surfaces that are not properly cleaned or have loose rust. Ensure the product is fully dried before painting, and don’t apply it in extreme temperatures or high humidity, as this can affect the drying process. Following the instructions carefully will ensure the best results and long-lasting protection.

How to Choose the Right Rust Converter for Your Project

When selecting a Rust Converter, consider the type and extent of rust you're dealing with, as well as the metal surface. For heavy rust on large surfaces, choose a high-quality Rust Converter like the one available at Chemikal States. It’s designed for both DIY enthusiasts and professionals, providing excellent coverage and long-lasting protection.

How to Apply Rust Converter.

Applying a Rust Converter is straightforward. Start by cleaning the surface to remove loose rust, dirt, and grease. Shake the Rust Converter bottle well before use, then apply it evenly to the rusted area using a brush, roller, or sprayer. Allow the product to dry and react with the rust, which typically takes 24-48 hours. For the best results, apply a second coat if needed.

How to Maintain Metal Surfaces After Using a Rust Converter

Once you’ve treated the rust with a Rust Converter, it’s important to maintain the surface to prevent future rusting. Consider applying a primer and paint or a protective coating to seal the surface. Regularly inspect the metal for signs of new rust and touch up any areas as needed. Proper maintenance will extend the life of the treated surface.

How to Store Rust Converter Safely

After using your Rust Converter, make sure to store it in a cool, dry place, away from direct sunlight and extreme temperatures. Keep the container tightly sealed to prevent the product from drying out or reacting with air. Storing it properly ensures that your Rust Converter remains effective for future use.

How to Clean Up After Using Rust Converter

Cleanup is easy after applying Rust Converter. If you used a brush or roller, rinse them with water before the product dries. For any spills, wipe them up immediately with a damp cloth. Make sure to dispose of any waste according to local regulations, especially if the Rust Converter contains chemicals that need special handling.

How to Maximize the Effectiveness of a Rust Converter

To get the most out of your Rust Converter, apply it in optimal weather conditions—moderate temperatures and low humidity are best. Avoid using it in very cold or hot conditions, as this can affect how well the product works. Additionally, make sure the surface is as clean as possible before application, and always follow up with a protective coating or paint to lock in the benefits.